Irish Stew
Yummy stuff on a chilly day. Irish stew is one of those easy to mess up things. It seems super simple but if you get too carried away you can end up with something that is less than appealing.
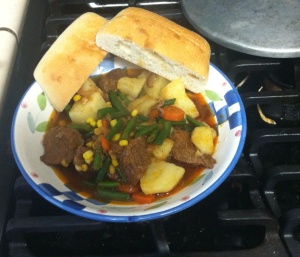
The final product. It was delicious!
Generally speaking, a stew is sort of a soup but with bigger chunks of goodness. For my version I use beef, some lamb, potatoes, carrots, onions, a bottle of beer, salt pepper, corn and green beans. You can add other vegetables like turnips, celery, cabbage, etc. Avoid the sissy vegetables like cauliflower.
First, chop up two baseball size onions into a medium dice. Set them aside.
Peel and cut up two or three carrots. You want about a cup of carrots so what ever that works out to, go for it.
Get your locally sourced beef and lamb ready to go. By locally sourced I mean the super market that is closest to your house. I take the beef, usually about two pounds, and rinse it off. The lamb, usually just a couple of chops are cut up into cubes. In a deep pot I render off some bacon. Then add some oil, a few tablespoons or so.
Start browning the meat. Before you put the meat in the pot, dry it off. This helps them meat to actually caramelize and
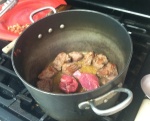
The brownin’ o’ the meat…
not go grey and boiled looking. Add beef until the bottom of the pot is almost covered, leave enough room to turn your meat. Brown it on all sides and then remove. Do this until all the beef is browned. Do the same thing for the lamb.
After browning drain off most of the oil at the bottom of the pot. Bring the pot back to temperature and throw in your onions. Stir them around, add a pinch of salt to help break down the onions. Once they start to look a little translucent throw in your carrots. Mix everything around so it seems like you are a chef.
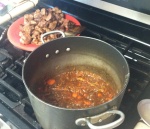
Vegetables simmering with beer. Meat waiting to dive in.
Turn the temperature down a little and dump in a bottle of beer. NOT one of those giant bottles of Budweiser that you can buy at the CVS for a $1.49. Use a bottle of dark something…Harp, Guinness, Sapporo…you know, something made by people who care. Use a 12 bottle. This time around I used Newcastle Browne. Simmer that down and let it reduce.
As that that is happening peel and cut your spuds. When you cut them make sure they are pretty good size chunks, about the same size as the stew beef pieces. Put them in a separate pot to cook.
Go back to the stew pot and stir, scraping all the good brown bits off the bottom. Add back the meat, including the bacon that you used to render. Stir things around a little. Add water to just cover everything. Bring to a boil and then turn down to a simmer. Add some pepper and salt and a couple of bay leaves. Cover. Have a beer.
When the potatoes get to the point that they are almost done, drain them out but do not rinse them. Set the potatoes aside to cool. If you have a big pan you can spread them out on even better. As they cool they will get a starchy coat which will help them stay firm in the stew and keep a nice ‘bitey’ texture.
After about an hour check the stew. The meat should start getting softer. It may take a lot longer, maybe just a little. You want the beef to come apart under a fork. If you have to work at it there is some more cooking to be done. You may have to add a little more water, but not too much. You really want as little juice as possible.
When the beef is right fold in the potatoes. Be gentle, you don’t want mashed spuds! After this add corn and green beans. I use frozen veggies so let the temperature of the stew come back to a boil and you are ready to serve.
Serve with some bread and butter along with a nice beer and you have a meal fit for a peasant.
I am sure you will have a completely different way of making stew, but that is only because the Irish are a confused lot. I am sure however you do it is fine. Wrong, but fine.
 One of the most fun things you can do in the kitchen (besides THAT) is to bake. You take on your mad scientist persona and mix all this stuff together to create magic in the oven. Unlike stove top cooking, where you add things while you are making the food, the ingredients are mixed together before the cooking process begins. A mistake in measuring can result in a waste of time and money. Exciting!


